
I wasn't going to make a guide for this, because it seems so damn easy. It ended up not being easy at all. Well, like most things, it's a lot easier after you've already figured out the best way to go about it. I learned a lot when working on the first hood vent, so now I'm going to document my work on the second and hopefully make it a lot easier on anyone else who wants to do this project.
Why do this?
Because it looks a lot better. I've always hated the fake vents. On all cars. I think I first saw them on a Mustang and was like "WTF?". There are a few reasons I wanted to do this:
1) It looks a lot better and I feel like less of a dweeb, having real vents.
2) Engine bay venting. My engine bay gets hot as hell and I want the heat to have an easier path out. (I'll get a vented CF hood eventually, but that's long term planning)
3) If you have the tools, this should cost you hardly anything at all to do. Just a lot of time. And possibly fingers, if you suck with razer blades as much as me.
Negatives
Pretty much just the fact that you can get water in your engine bay. With the engine cover on, most everything is protected. I'm gonna put a little electrical tape over the wiring harness on the Throttlebody, to just make sure it's good.
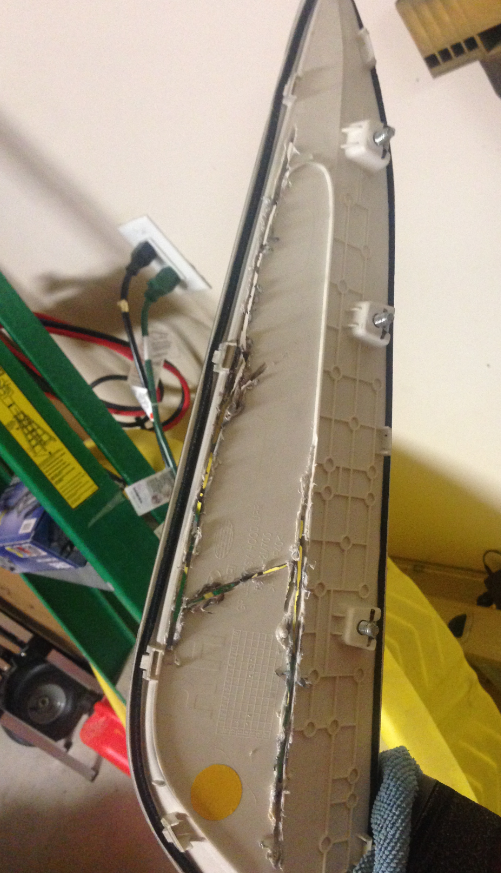
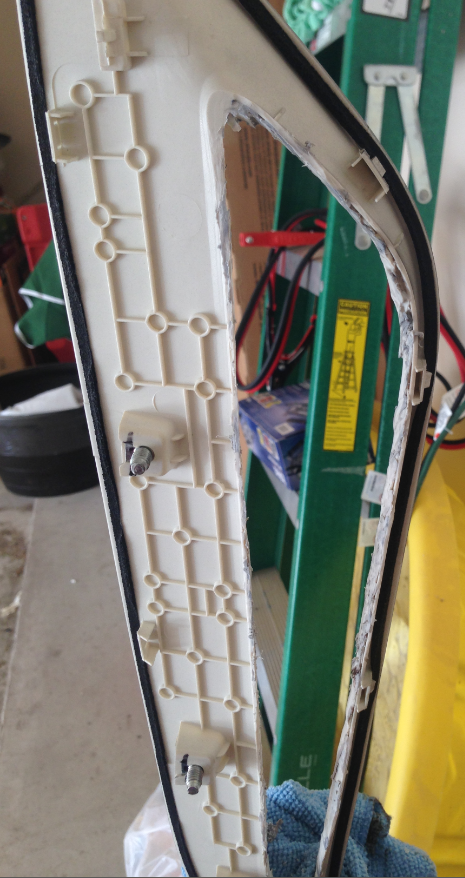
Removing the vents
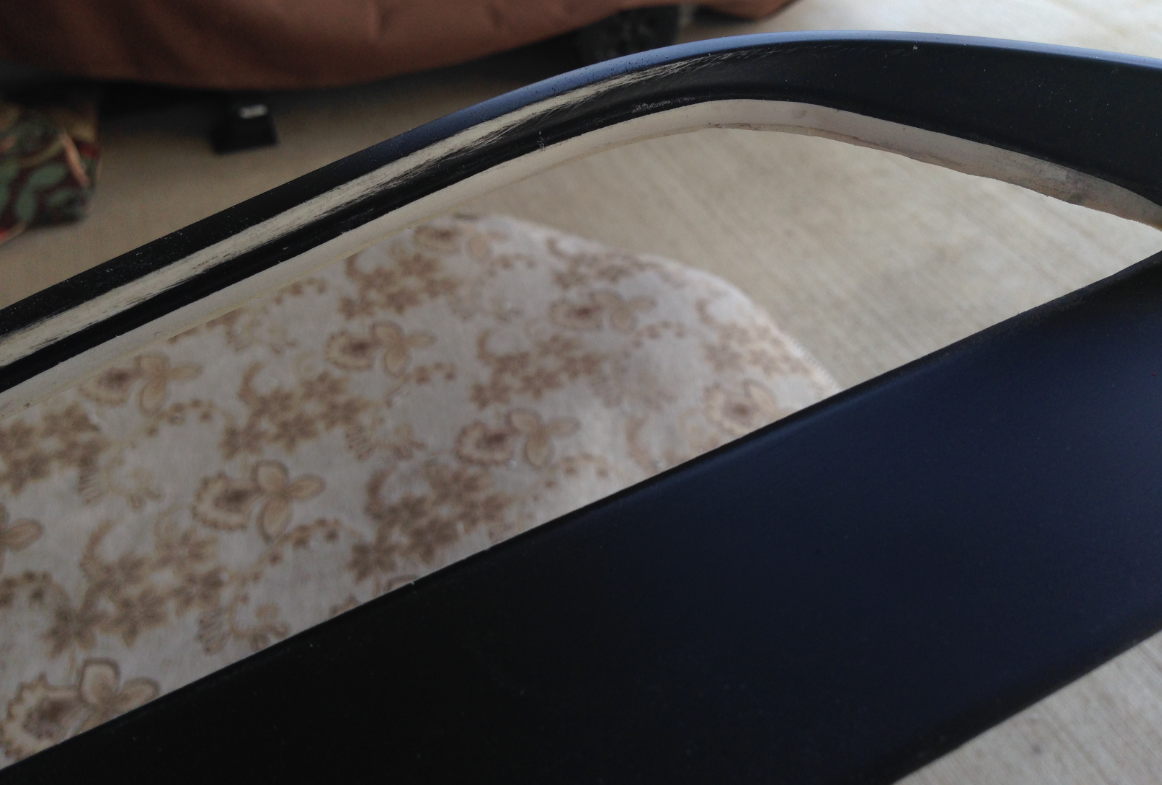
• You'll need to take off your hood liner first.
It's a super pain in the ass to get those round plastic push pins out of the hood. The first time I took the liner off (to dip the hood), I was careful and used 2 small flathead screw drivers to safely get each pin out. This time, I just said screw it and ripped the liner off completely, destroying it. You're gonna have to either remove it or cut holes out of it, to vent it, anyway. I opted to toss it.
• Take off your hood vents. They're held in by x3 10mm nuts and a yellow push thing. I took the push pin off and threw it away. The nuts are plenty to hold it in.
Overview
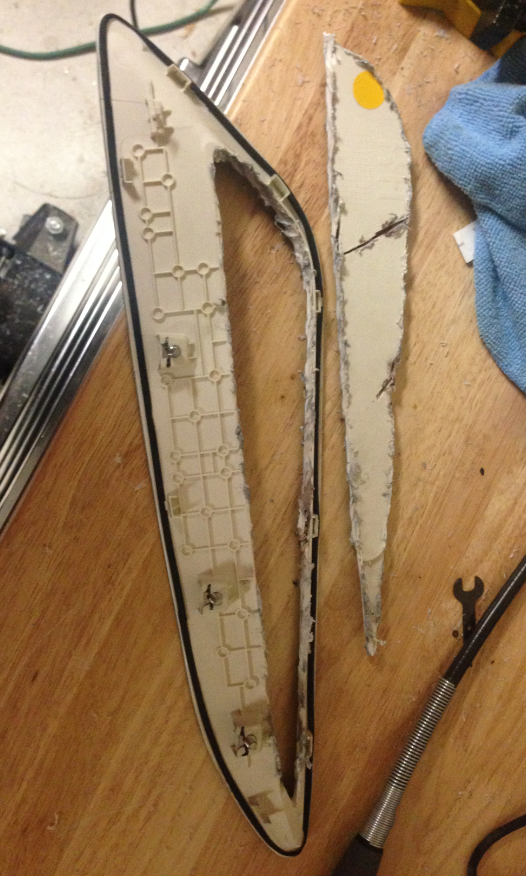
So let's get one thing straight. I thought this would be as simple as using a dremel to cut out the shape, sand it down a little, dip / paint it, and glue in the mesh.
The problem with cutting with the dremel is that the cutter bit heats up the vent and starts to melt the plastic. So melted plastic beads up and gets everywhere. On top of that, I learned that my dremel only works in one direction, and if you're right handed like me, that direction is to fling melted bits of plastic on your arms.
So the second time around, I still used my dremel, but my strategy changed a little. And having a rugged box knife was extremely helpful.
Summary of events:
• Dremel cut the basic shape
• Box knife the edges close to what you want
• Dremel sand the edges down
• really sand the edges down
• Dip it
• Cut / dip the mesh
• Epoxy the mesh in
WINNING
Ok! Let the burnt arms begin!
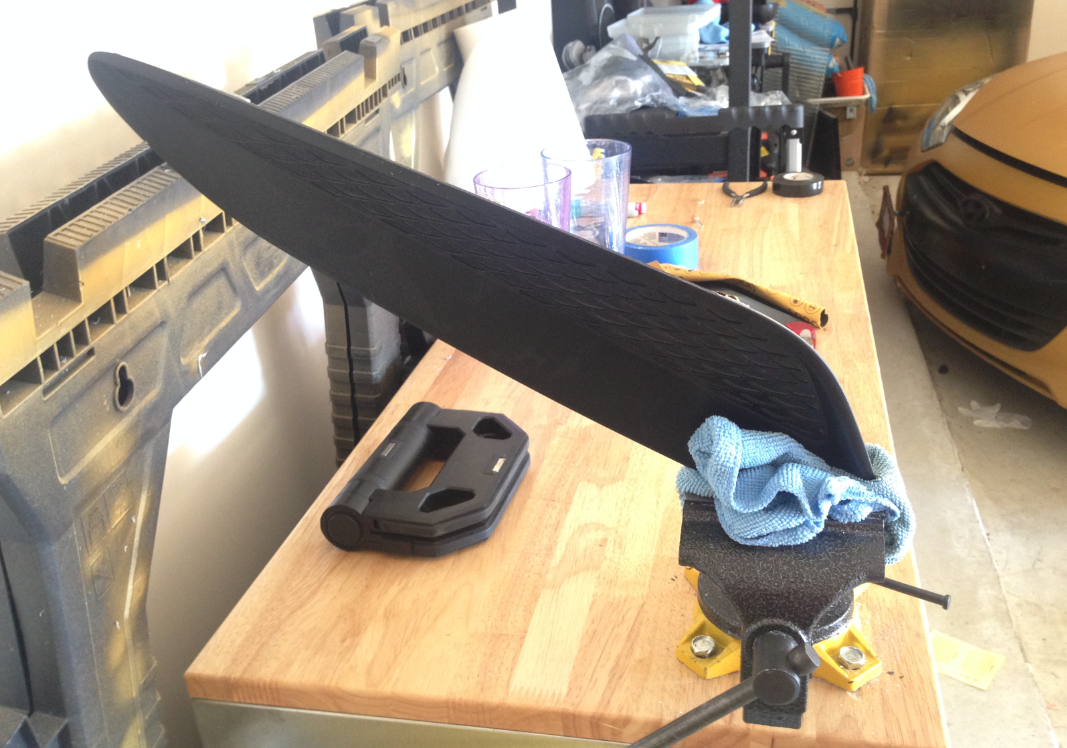
Cuttin em up!
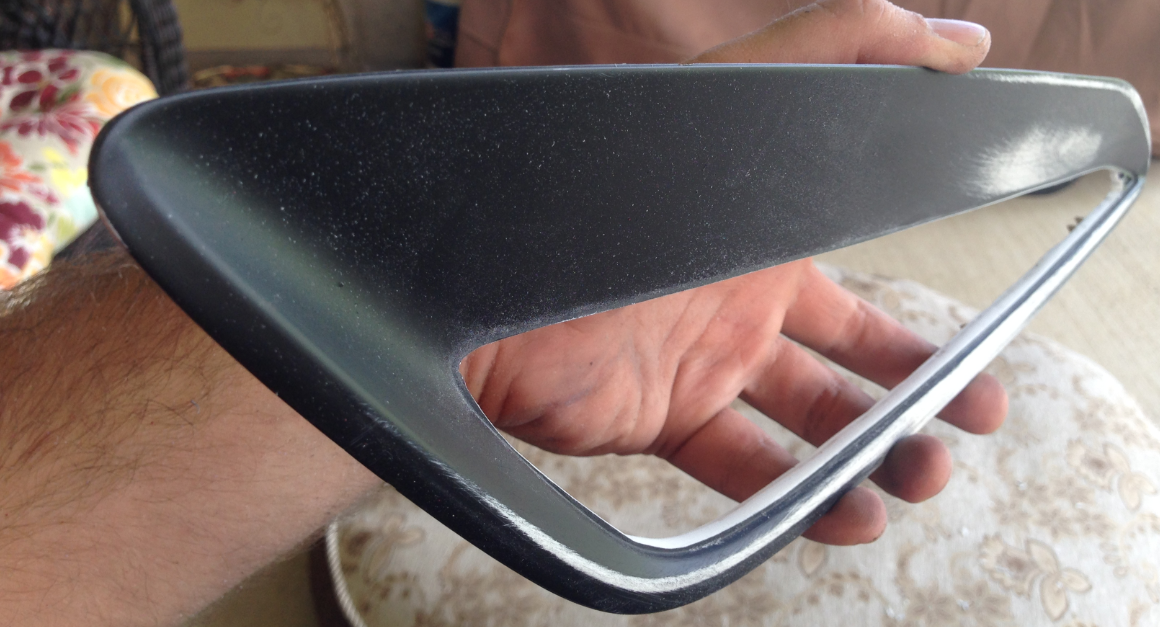
I started by putting a cloth around the bottom of the hood vent and then put it into a vice. As long as you don't crank it too hard, you won't have an issue. The vent is actually some pretty hard plastic. I had zero issue with it cracking or being too soft, during the entire experience.
![Image]()
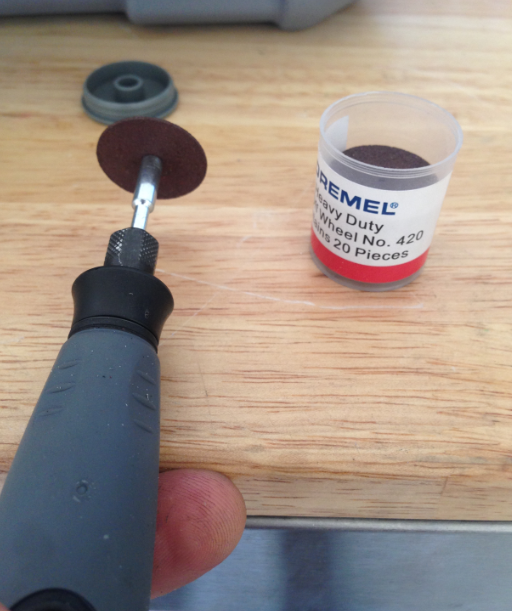
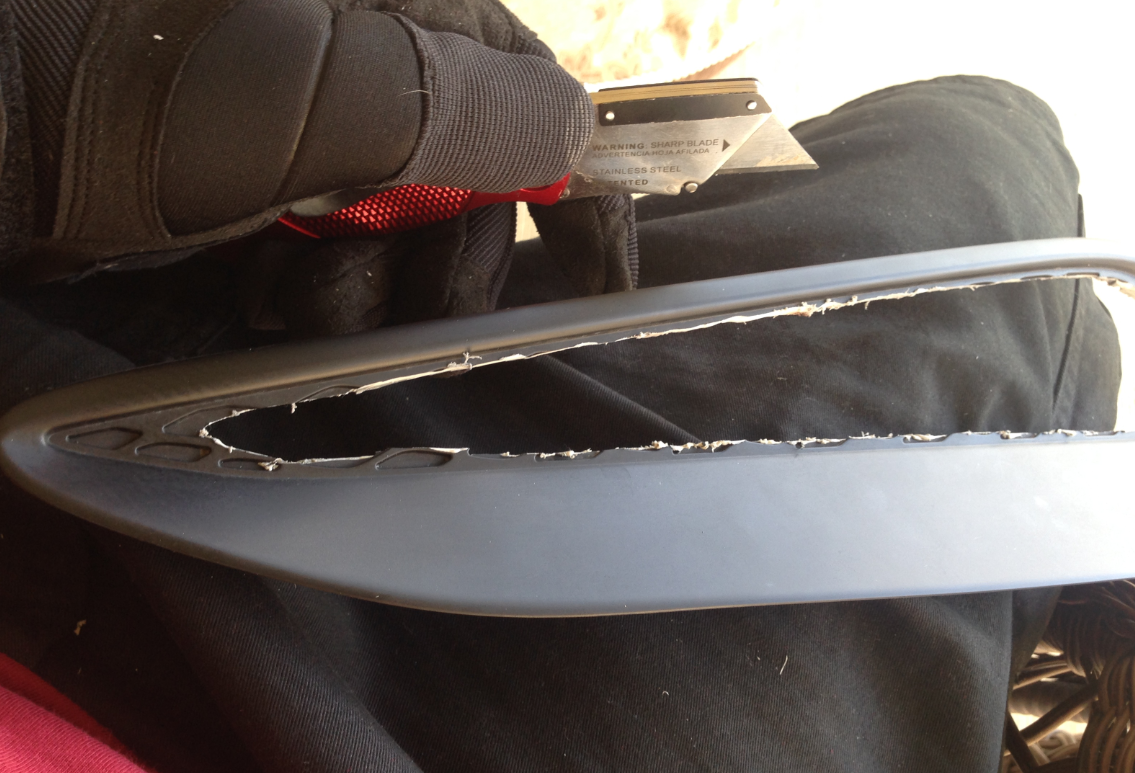
To cut the vent, I used a Dremel cutter wheel #420 .
• You MUST cut from the back. I did it from the front on the first vent and it was MUCH more difficult. Trust me.
• These things heat up fast and when they heat up, they become real easy to break.
• Try to cut completely straight. If you bend the wheel at all, it breaks.
• It will heat up and cause the plastic to melt and start to get goopy. It's okay. It's fairly easy to clean up the goops later. But as you work, if you can gently brush the goops, they typically fling away.
• I found it easiest to cut straight through and then back it off and take a short break and then continue. Give the blade time to cool down.
• I think I broke 6 or 7 of these things through out the process, so make sure you have plenty.
• At anyone point where you are working on the opposite end of the vice, the vent might wobble slightly. Just hold the vent with one hand and dremel with the other. It's pretty hard to do any permanent damage to the vent at this point, even if you slip with the dremel.
![Image]()
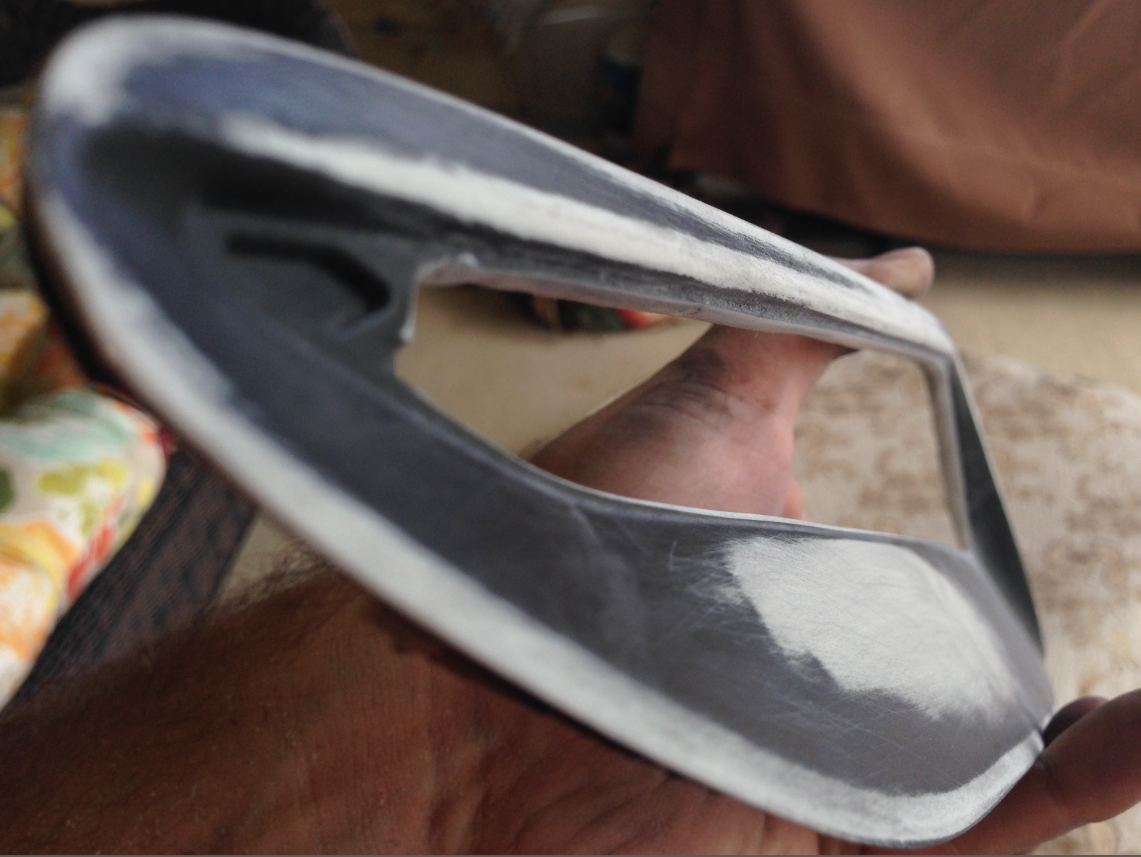
You can follow the grooves that are already in the back of the vent. They are close, but you'll still need to trim more later. It's a nice buffer with a margin of error. If you're anything like me, you'll keep checking on the top side every minute or so anyway, just to make sure.
![Image]()
![Image]()
Part way done:
![Image]()
Done:
![Image]()
![Image]()
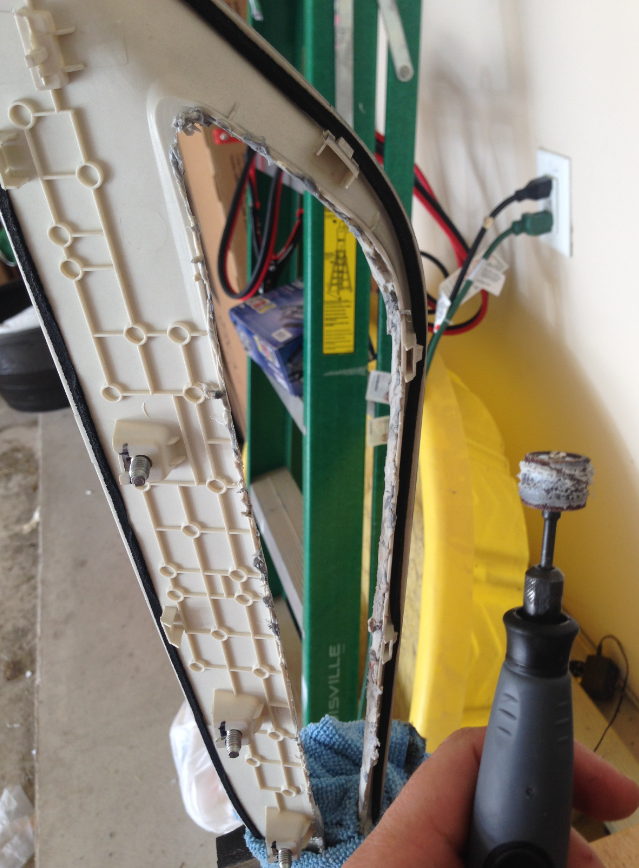
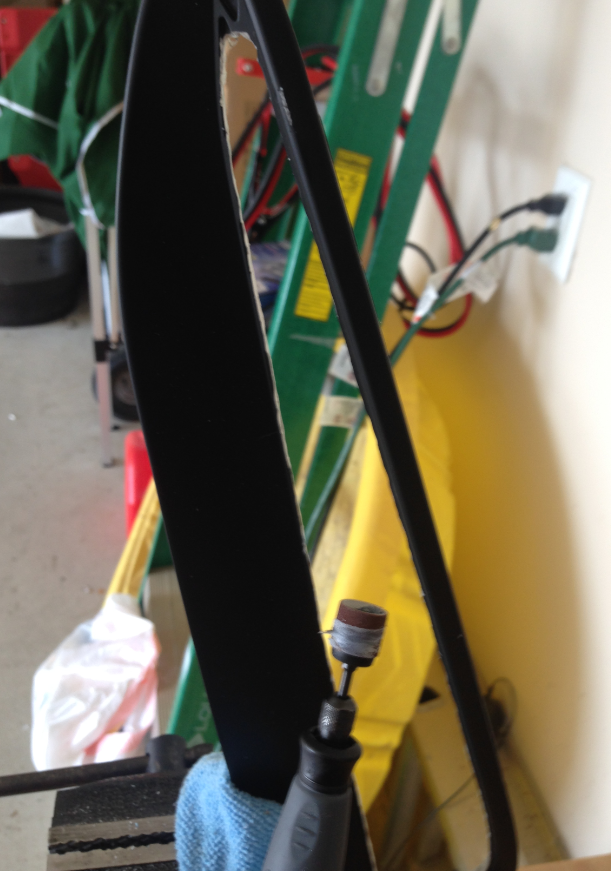
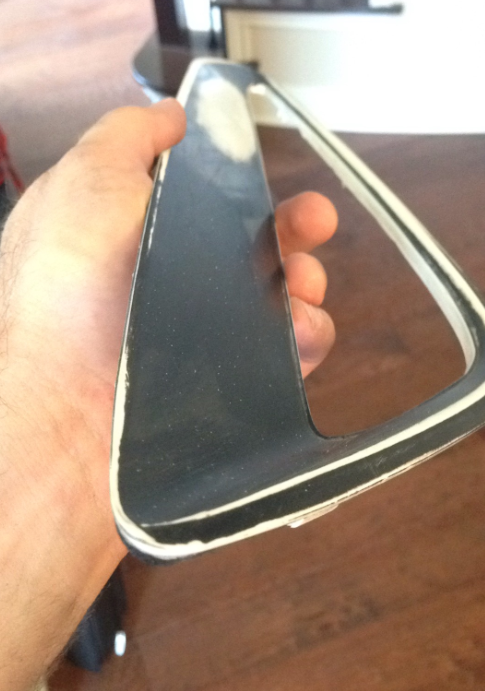
Sand some crap off!
I switched to the dremel cylinder sander and gently sanded down some of the melty goop crap. Just minor cleanup before the next stage.
![Image]()
![Image]()
Razering the edges closer
I'm sure there are a million ways to do this next step. I prefer using a heavy duty box razor. It just worked well for me.
• I have combat gloves that helped keep my hands safe (sometimes cutting towards my hands worked a little easier).
• I bought this perfect box razor from Home Depot. It worked really well.
• I just kept shaving off small layer after layer, until getting close to the edge I wanted.
• I was being pretty rough with the plastic and it didn't crack or even feel like I almost broke it. So unless you're he-manning it, you shouldn't have an issue.
• Have patience. This was probably the longest part, but it works really well for a clean look.
![Image]()
light Dremel sanding
Clean up the razor blade work just slightly with the sand cylinder on the Dremel. This makes it easier to fine tune the line. But be careful, too much and it'll melt more and cause the plastic to goop up. This is just minor clean up.
![Image]()
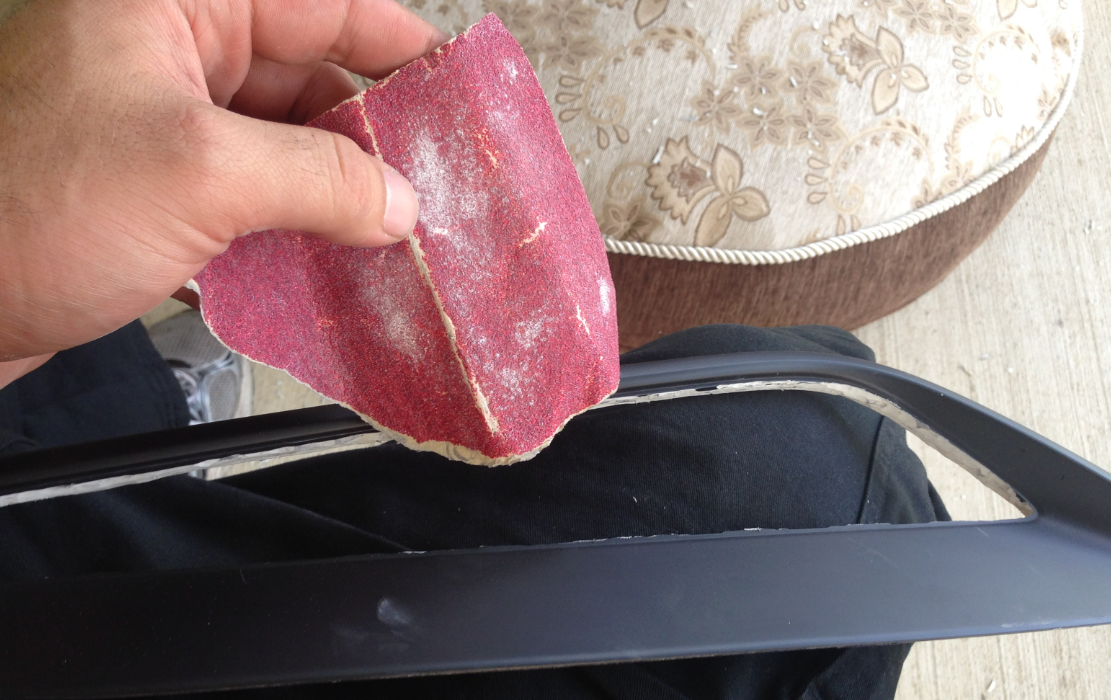
Proper Sanding
For this I used 80, 150, 400, 1000, and 2000 grit sand paper.
It's not rocket science. Start with the 80 and really work out the shape of the vent. Go to town until the shape is good. Then progressively work your way up until the whole this is smoother than a baby's ass. The progression:
![Image]()
![Image]()
![Image]()
![Image]()
![Image]()
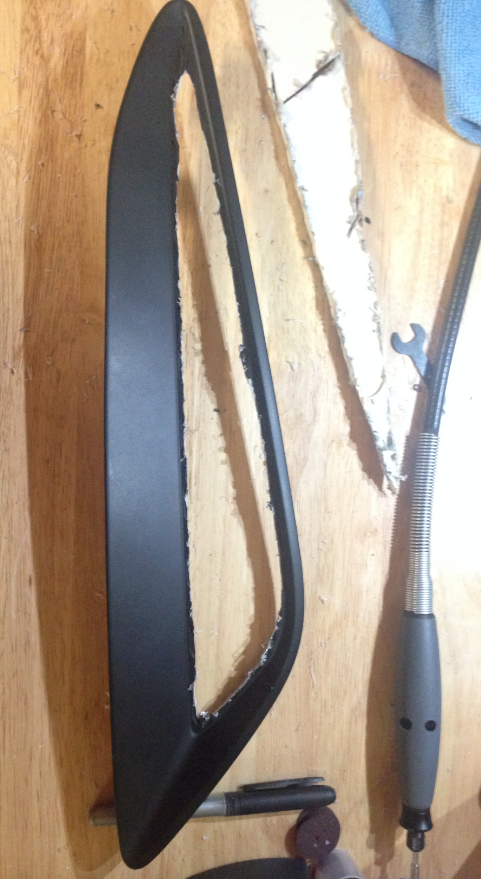
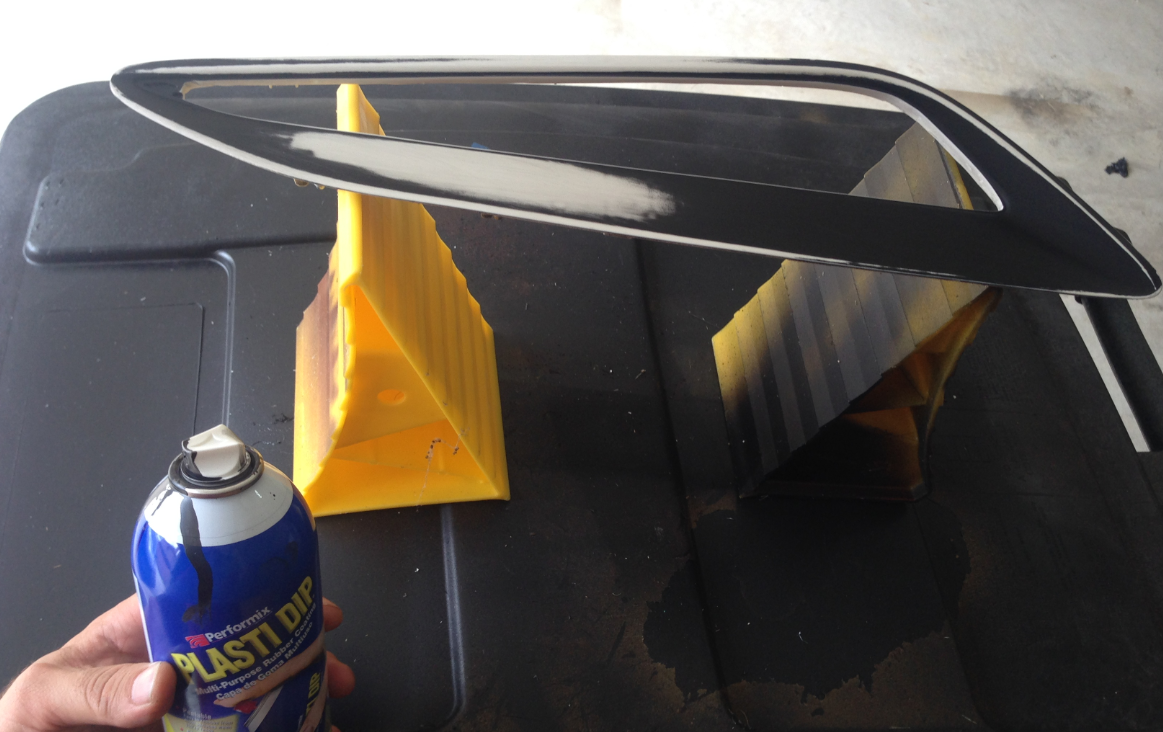
Paint
You do what you want here, but I like the way dip looks. Maybe I just suck with paint, but I like it. I cleaned and dipped the vent.
![Image]()
I didn't get a pic of the dip job, so you'll just have to see the done product.
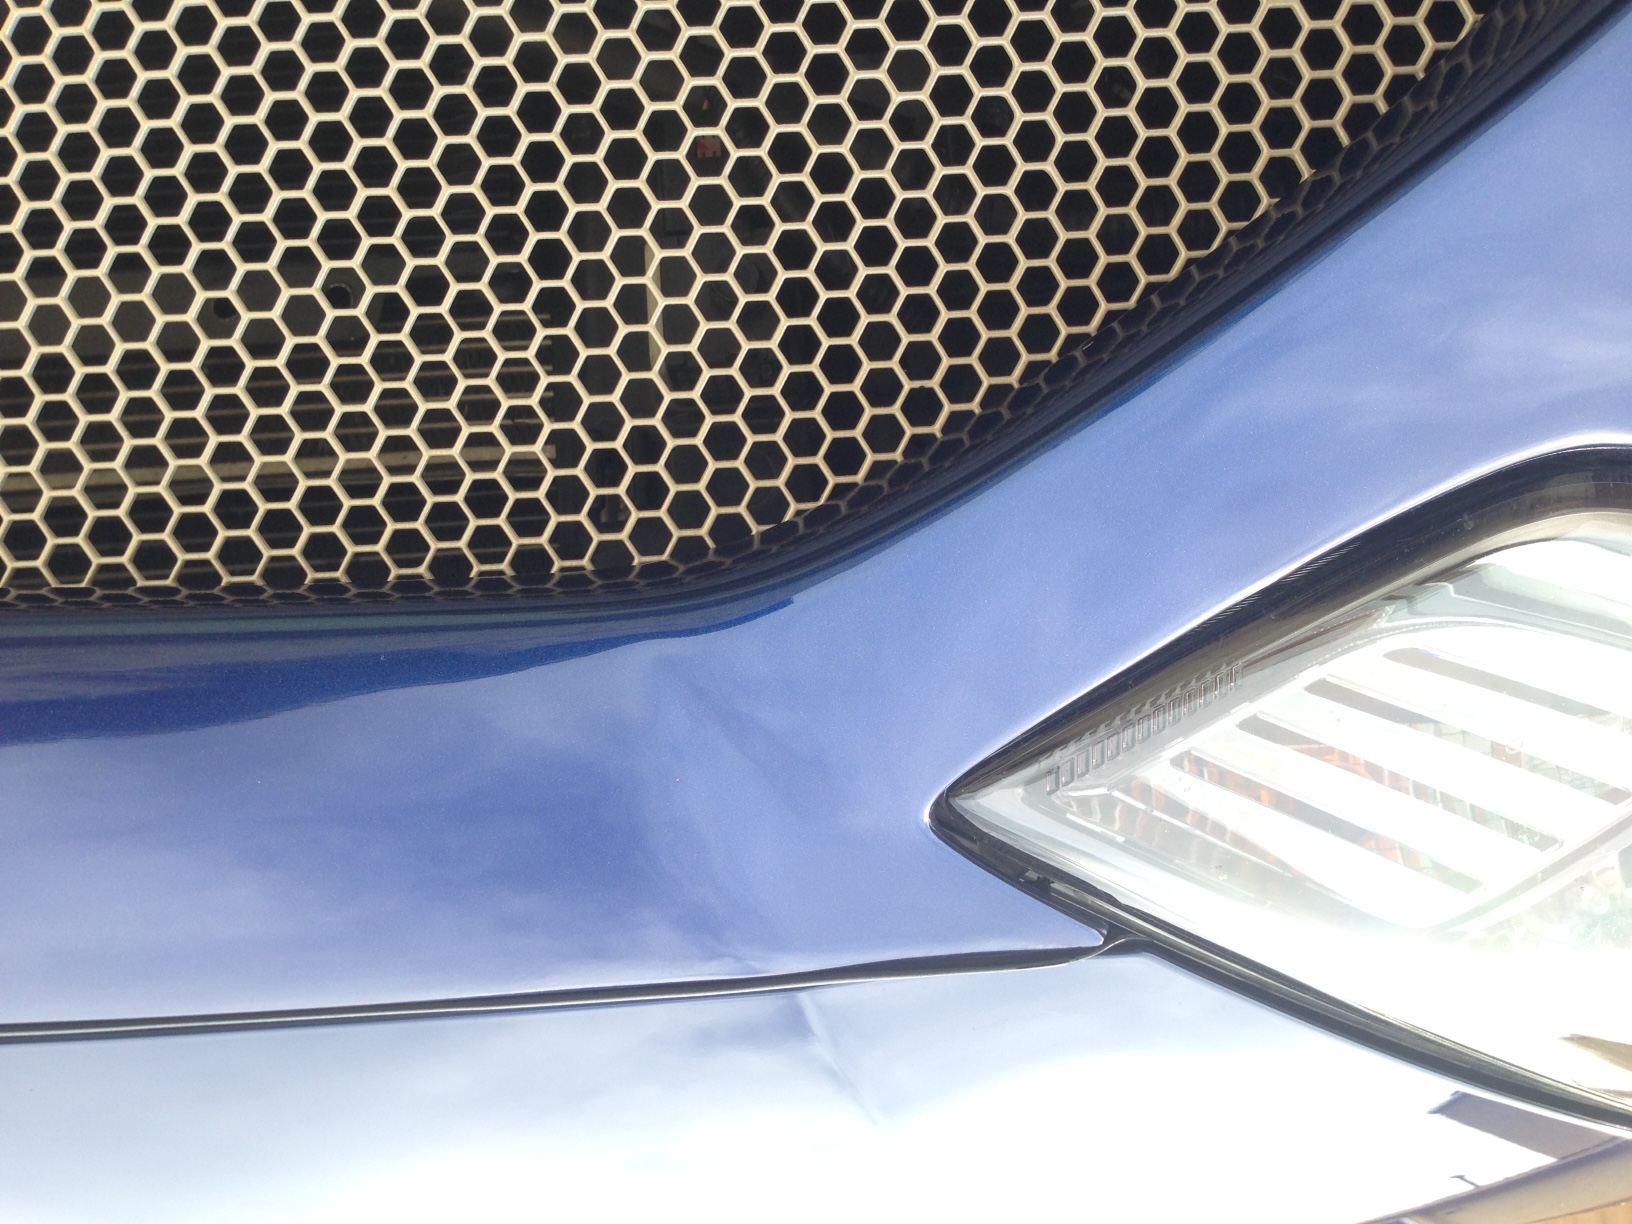
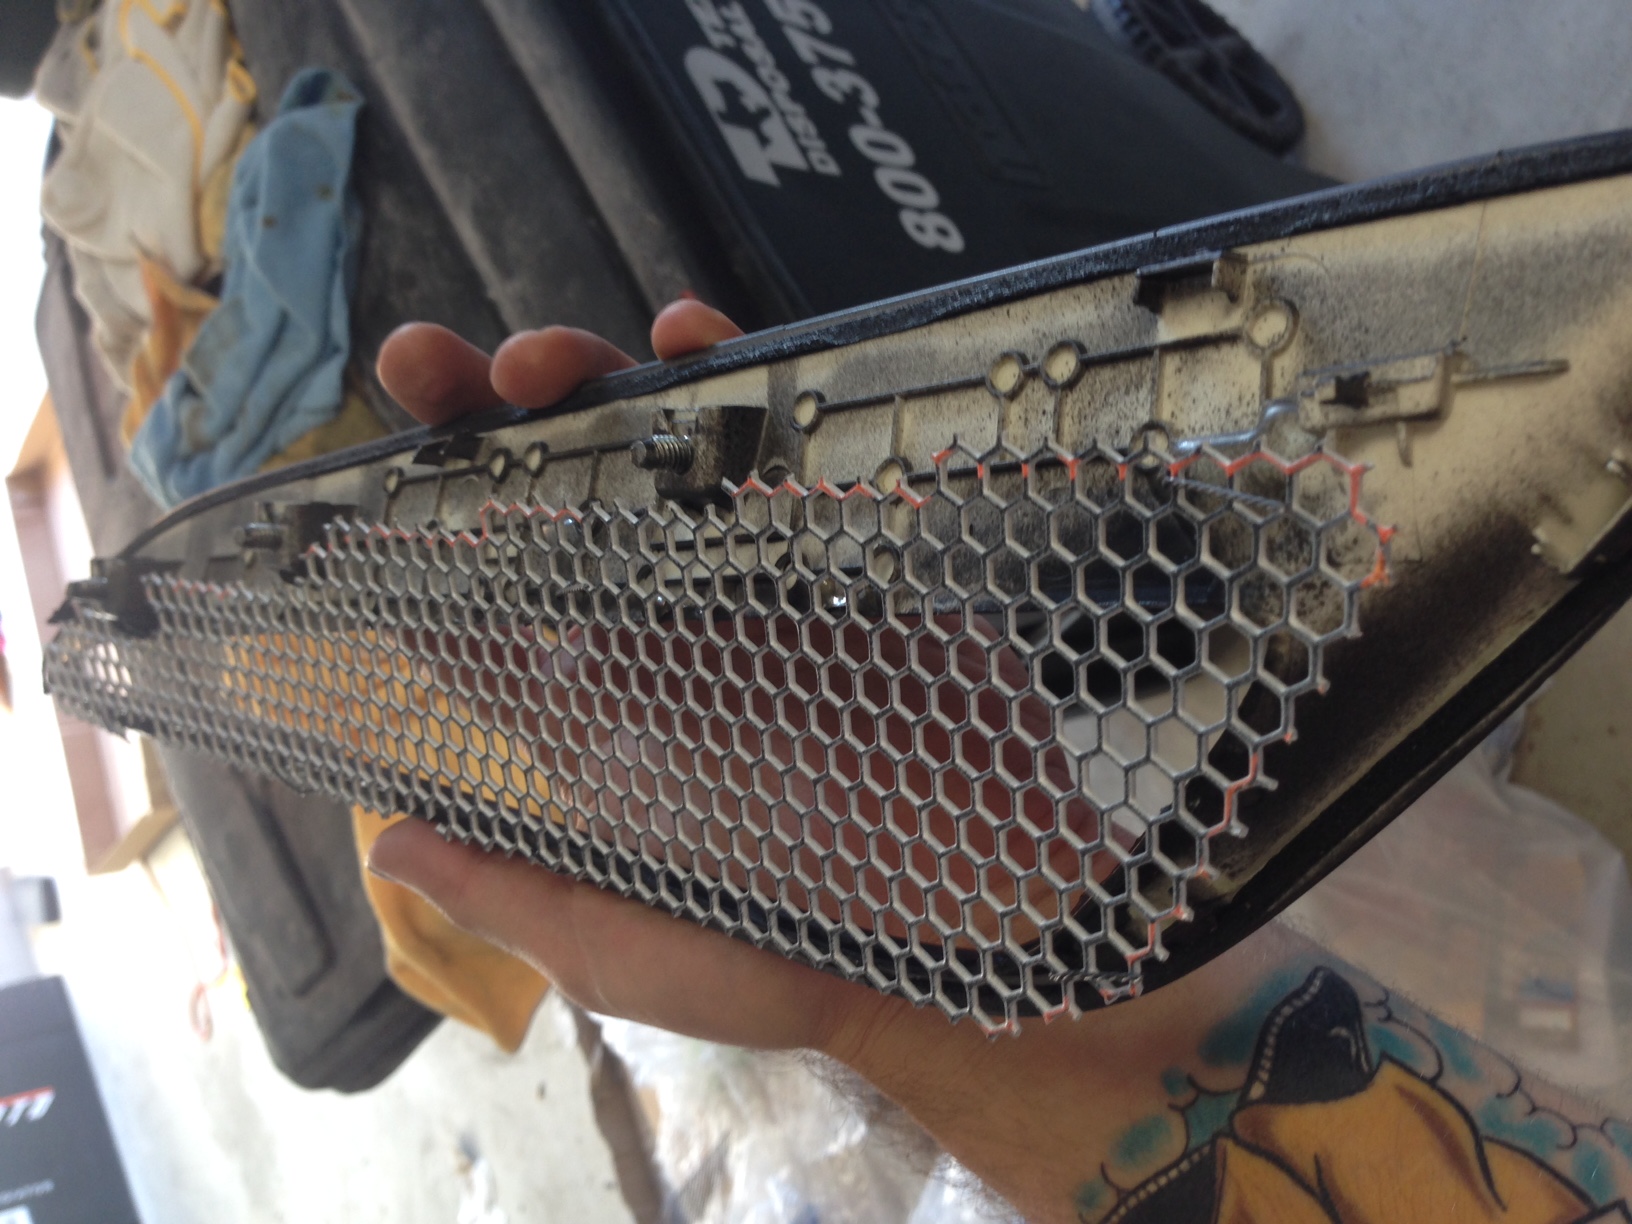
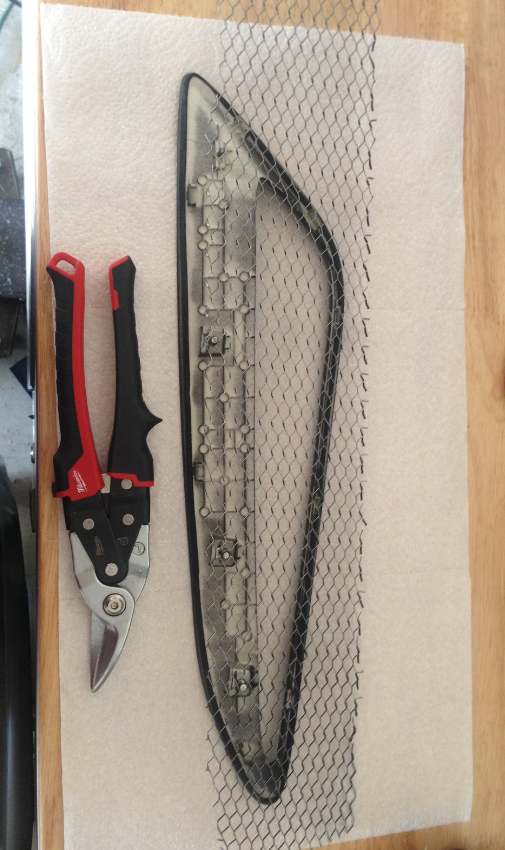
Installing Mesh
I scored some mesh from Home Depot that looks damn close to the OEM fake mesh on the stock vents. I like it!
• I dipped my mesh black to match the vents.
Installing the mesh isn't terribly difficult, but you'll have to be quick. Epoxy dries stupid fast.
First line up the mesh with the vent to make sure it's the direction you want. I followed the OEM alignment.
Just lay the mesh over the vent and then snip around the edges you need with tin snips. You don't have to be exact, just don't trim too much. You can always trim more after you glue.
![Image]()
![Image]()
![Image]()
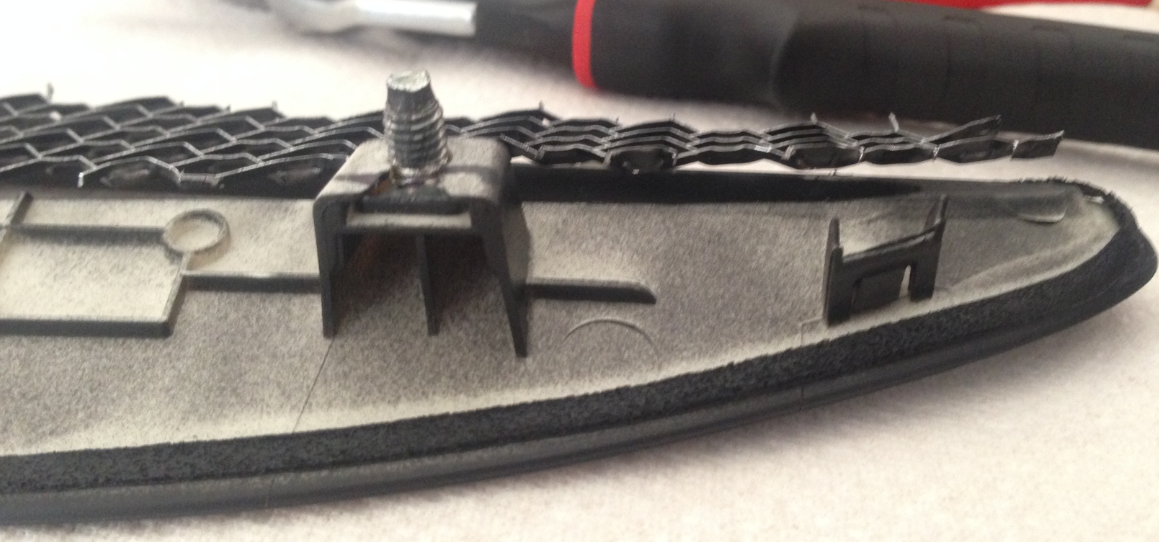
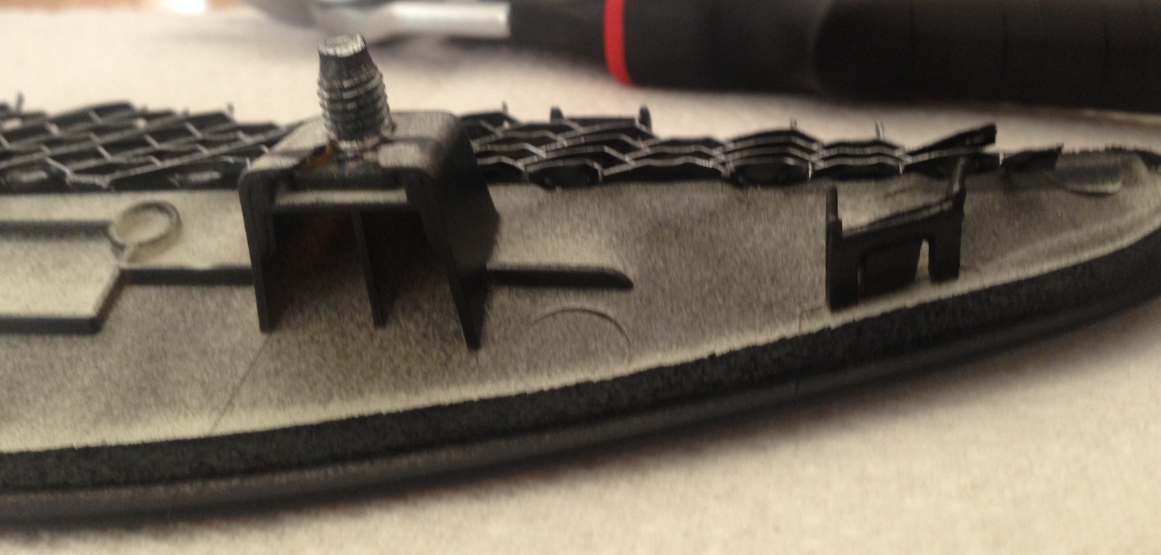
I had to bend the edges down a little first:
![Image]()
![Image]()
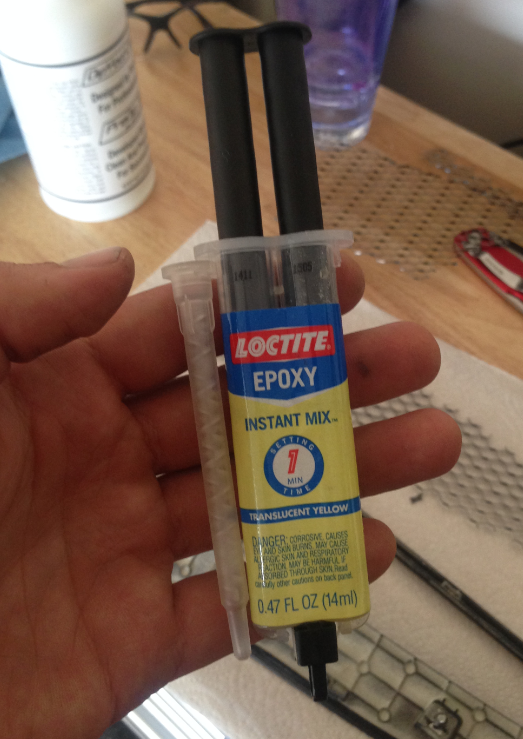
I used this for epoxy:
![Image]()
Once you mix the two chemicals, you have like 90 seconds to complete the task.
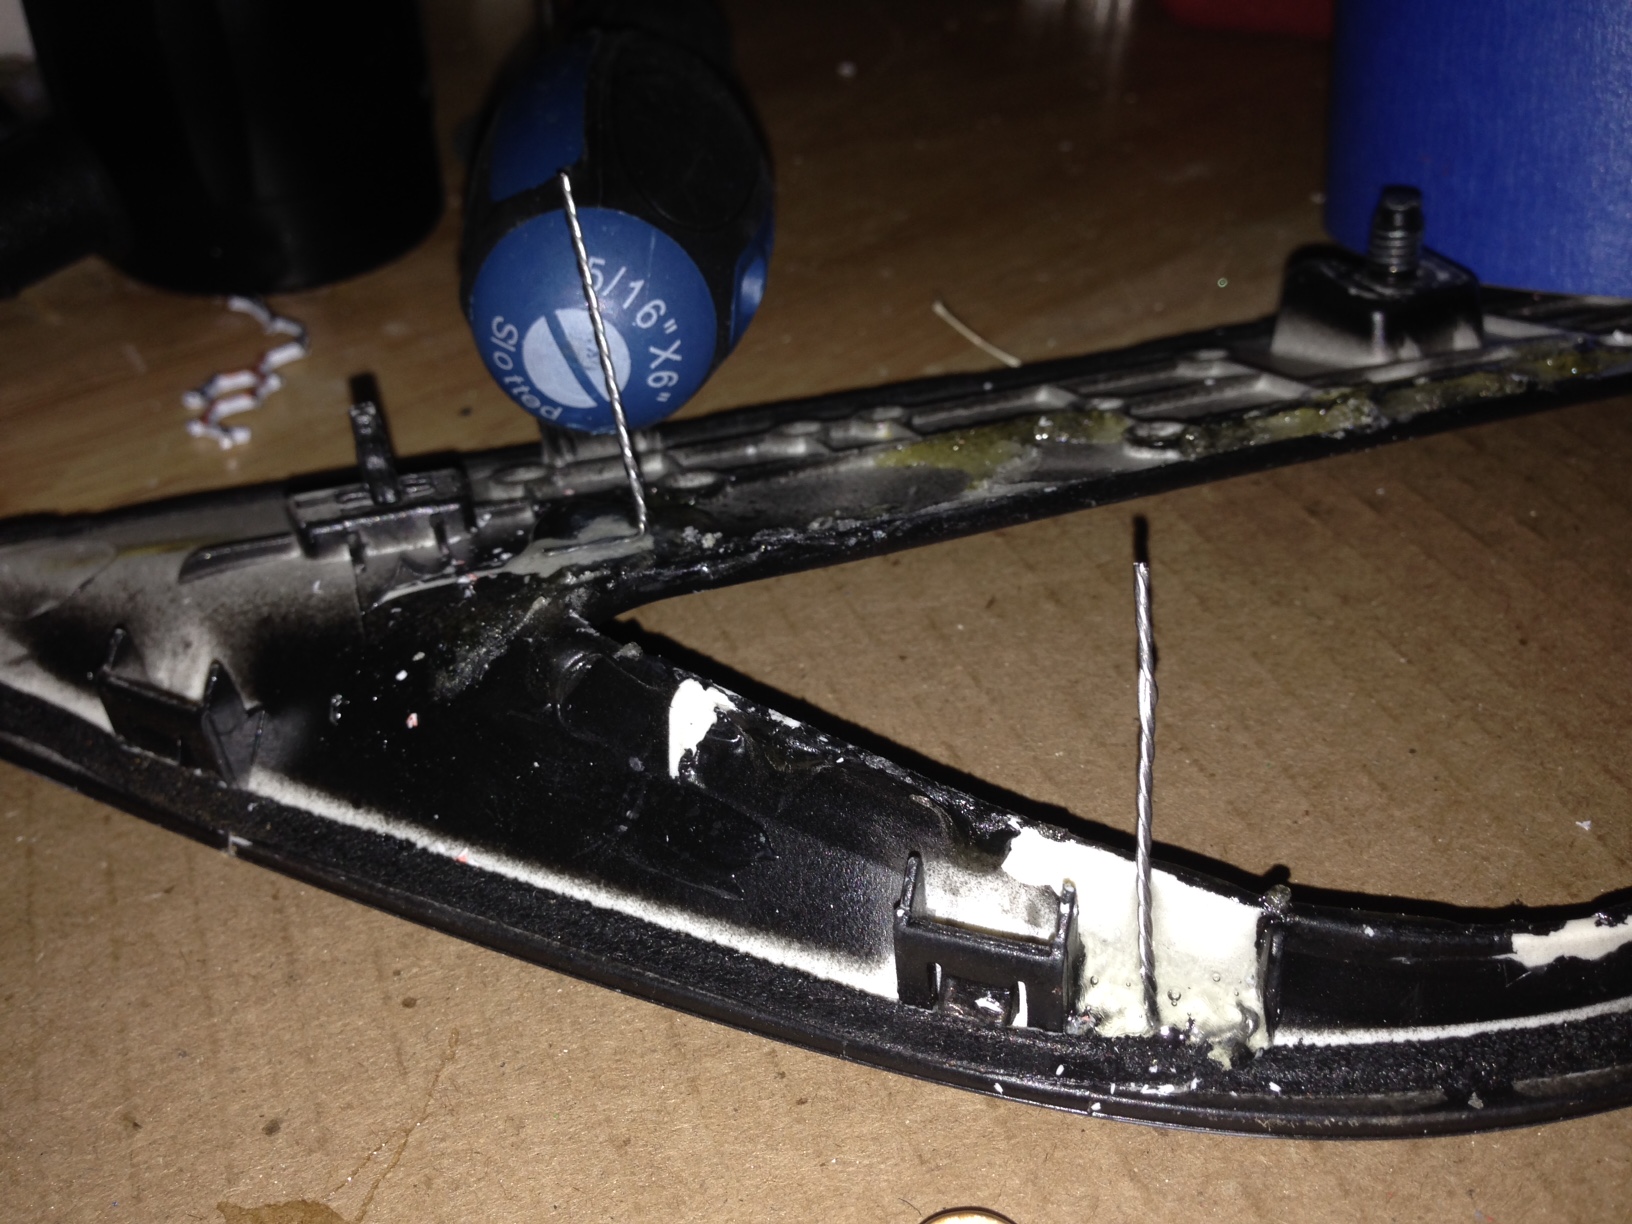
• Just run the epoxy around the edge of the vent. I had some drip onto the other side, and it sucked. I had to peel the dip and respray. So try to keep it all on the rear side.
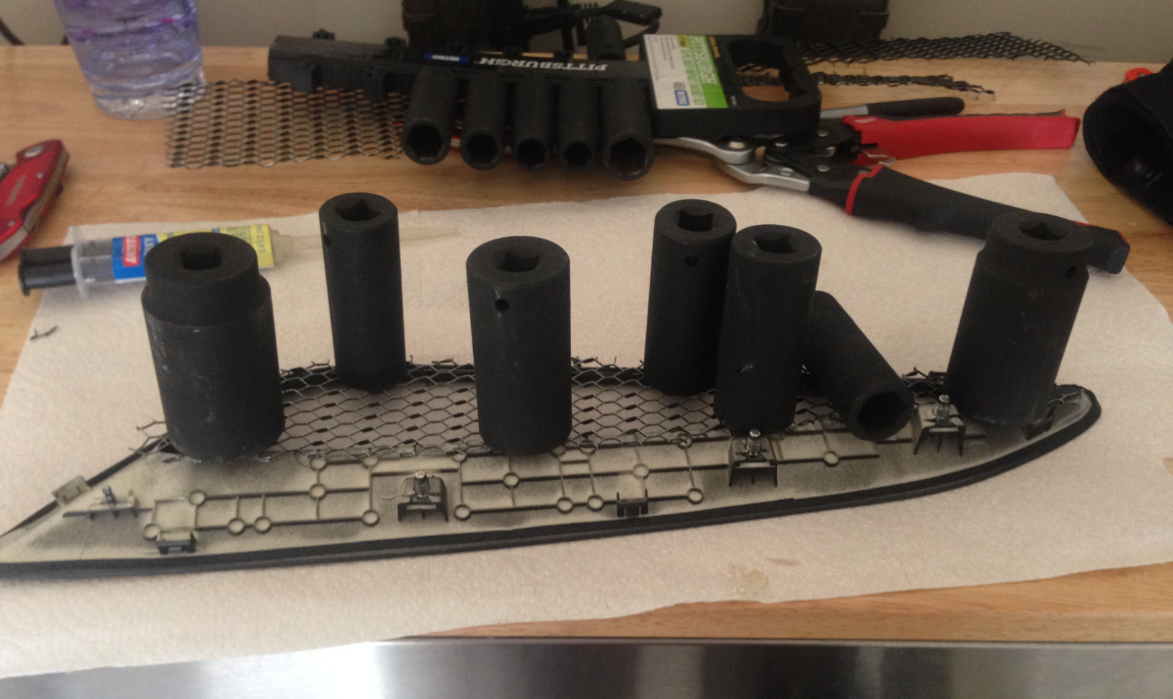
• Immediately put the mesh down where it needs to go
• Put something heavy on the mesh to hold it in place. I found that impact gun sockets work nicely")
![Image]()
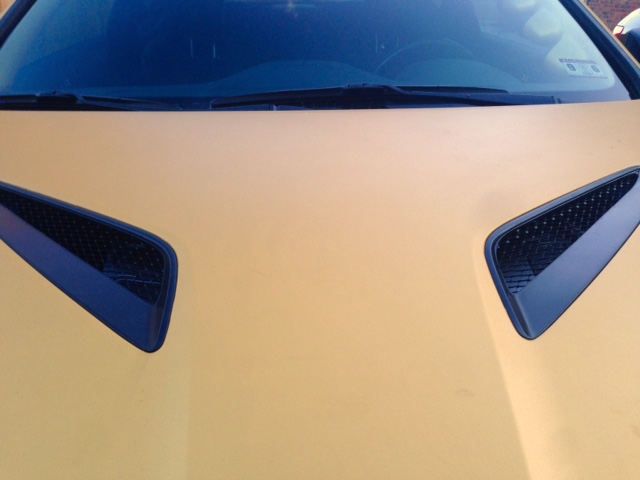
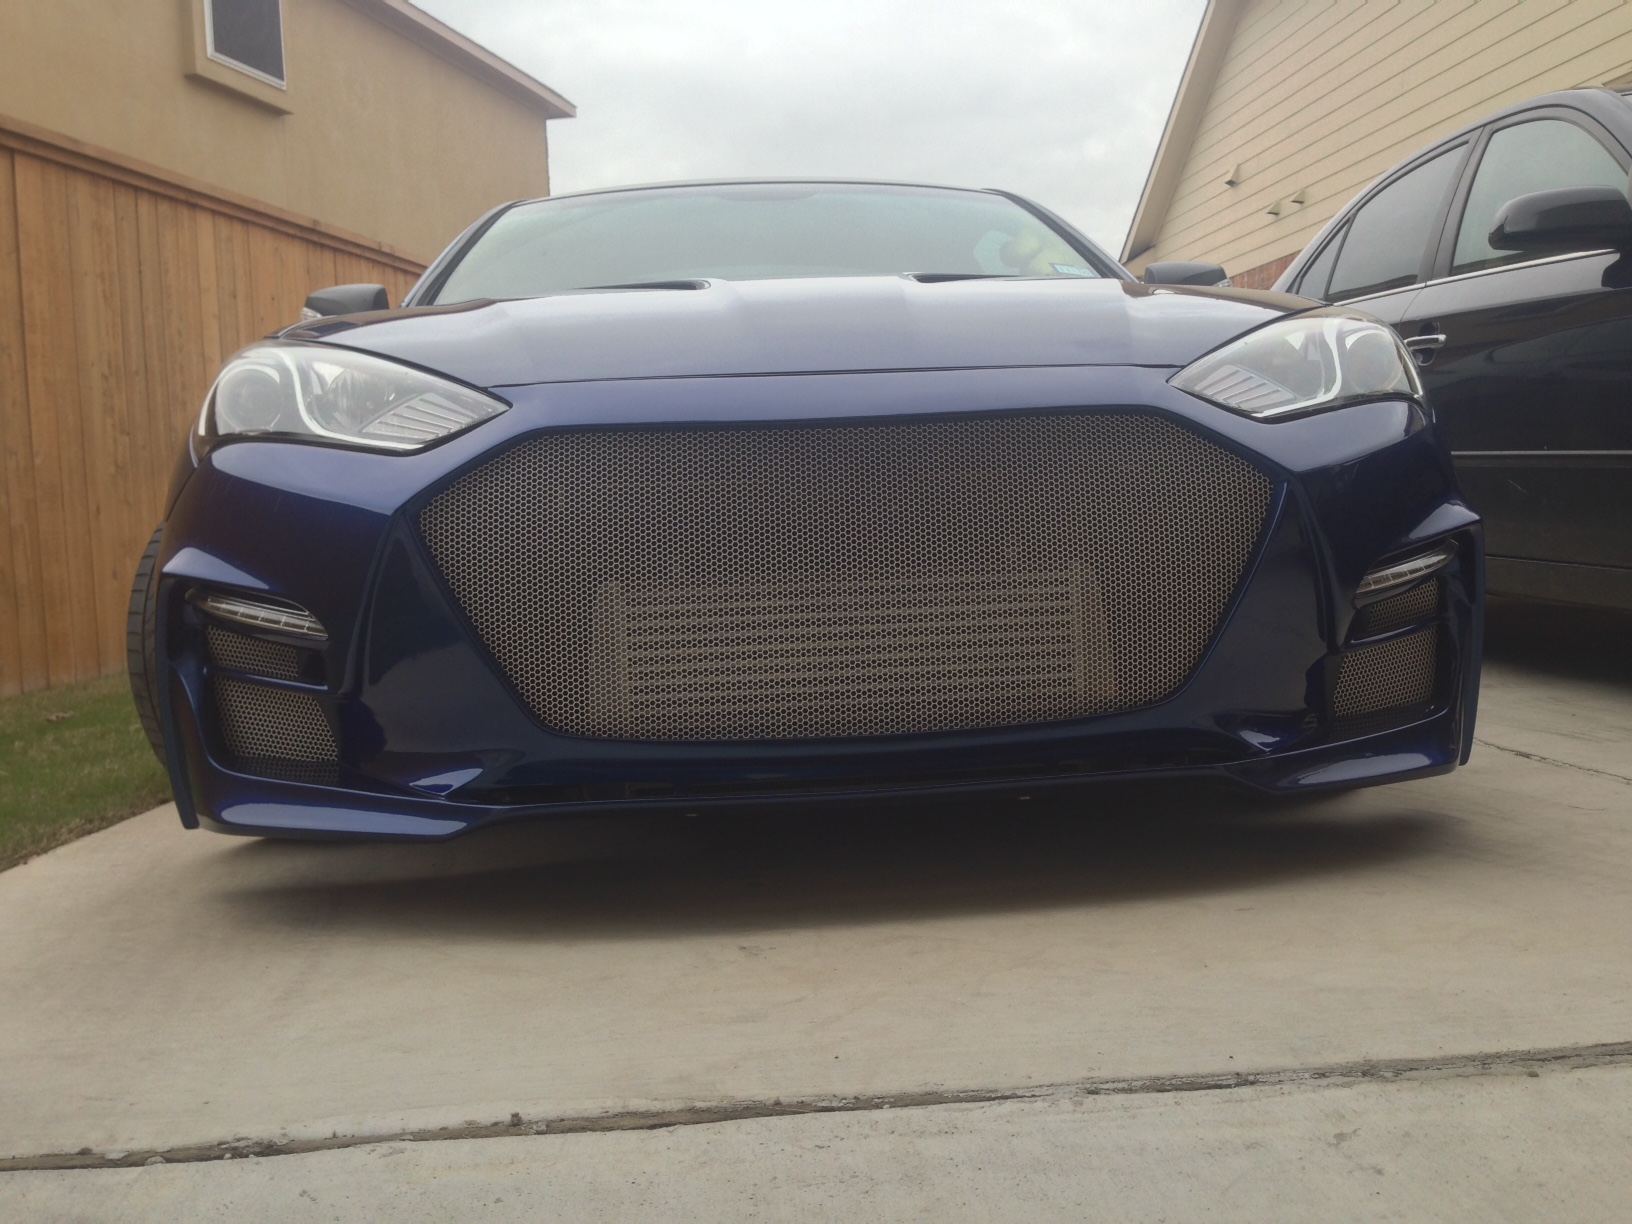
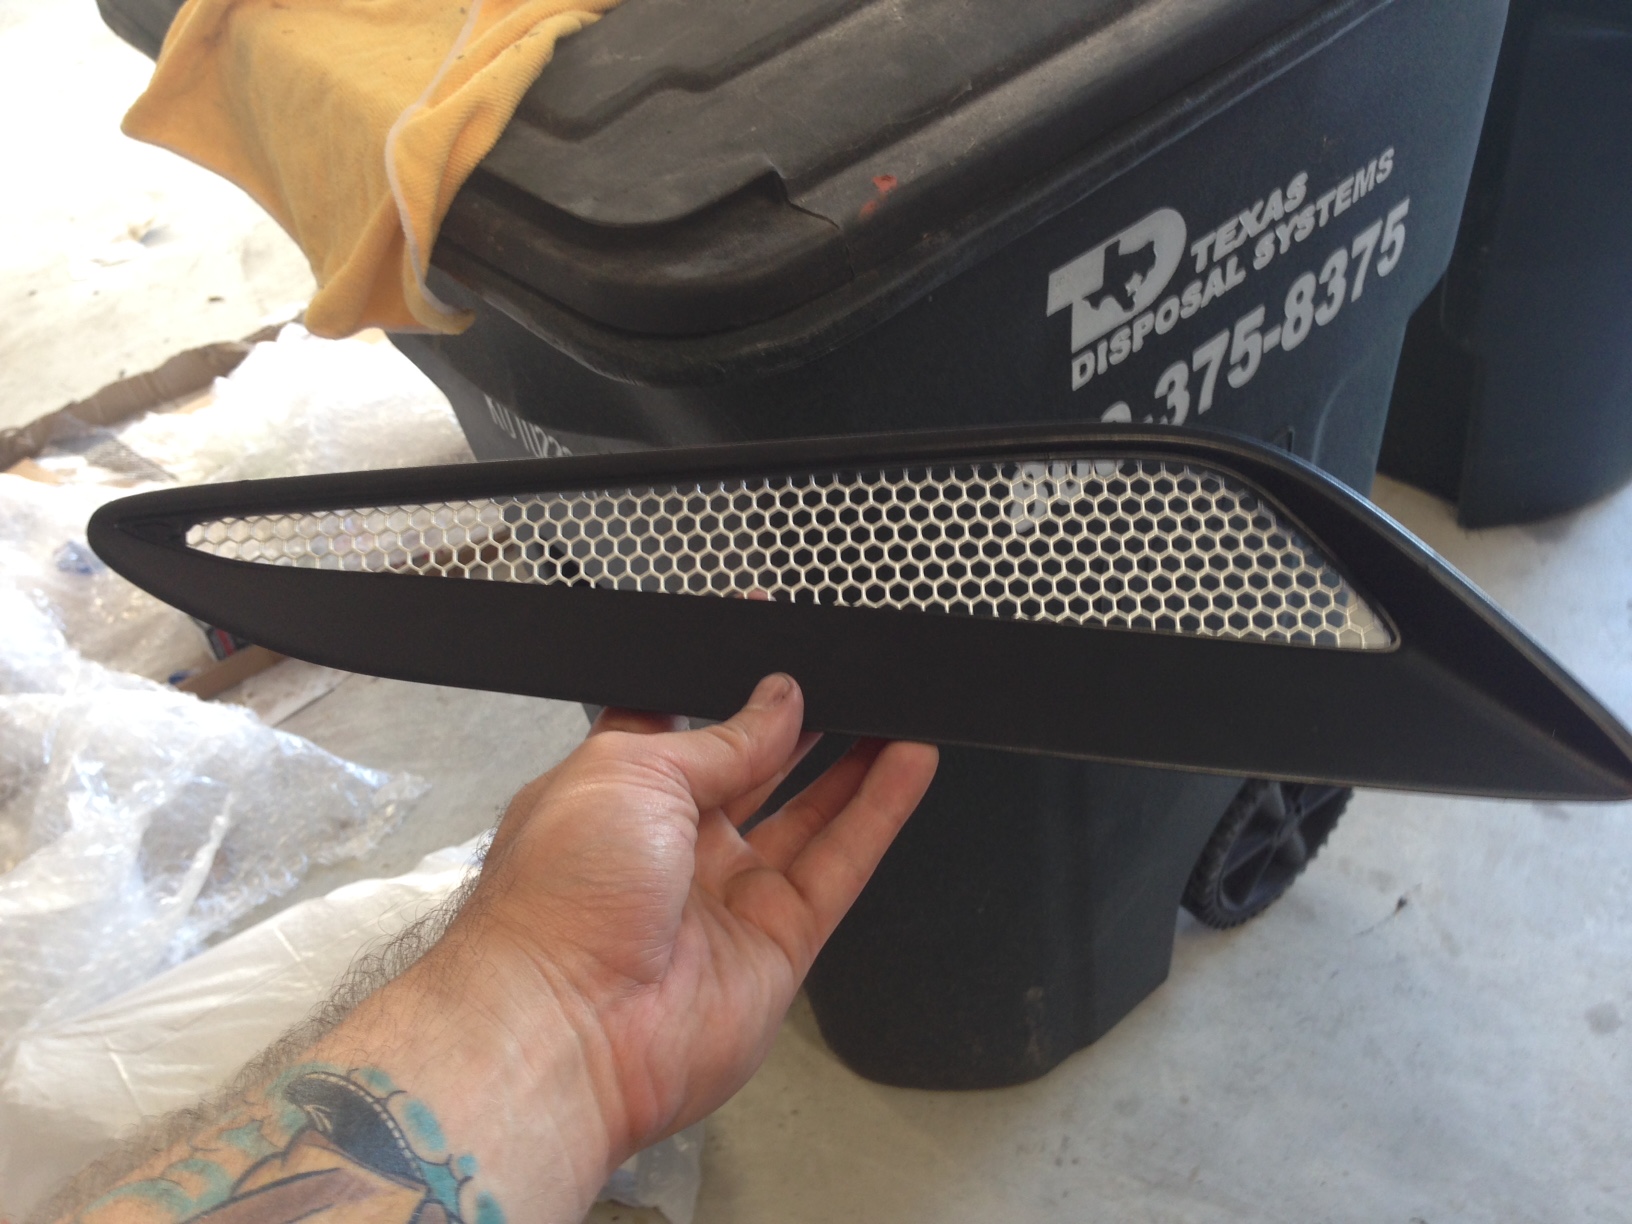
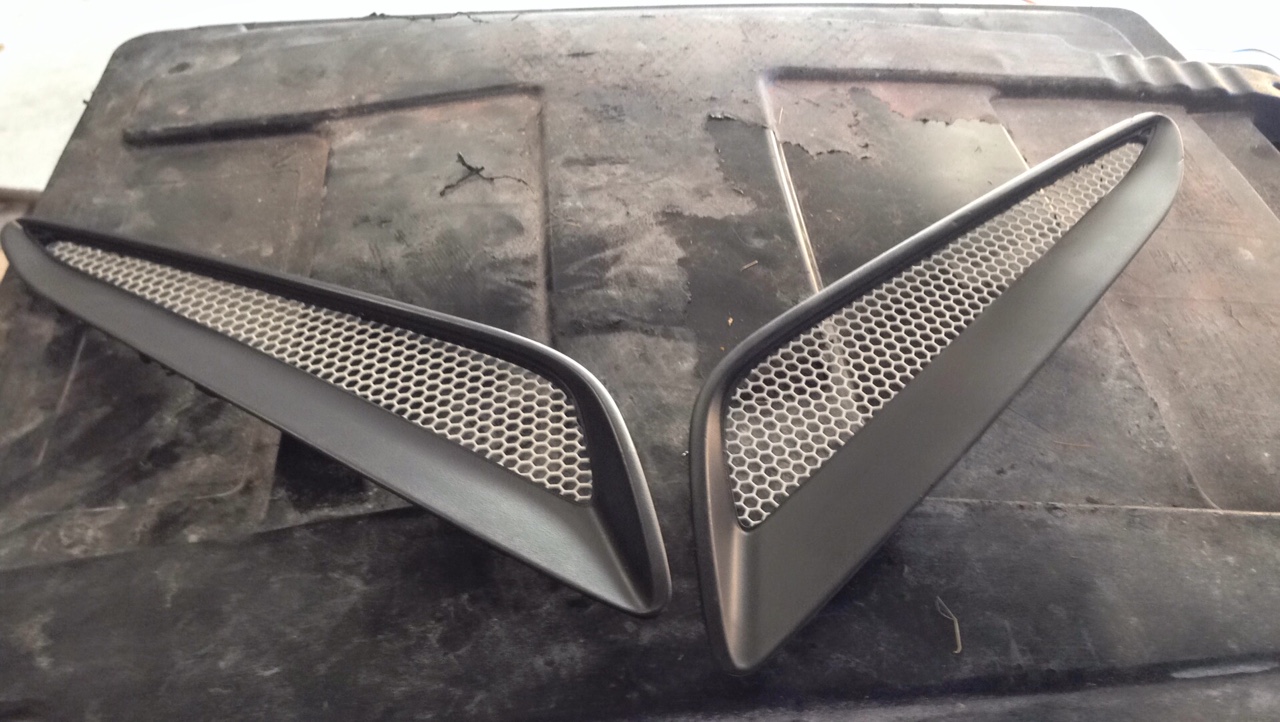
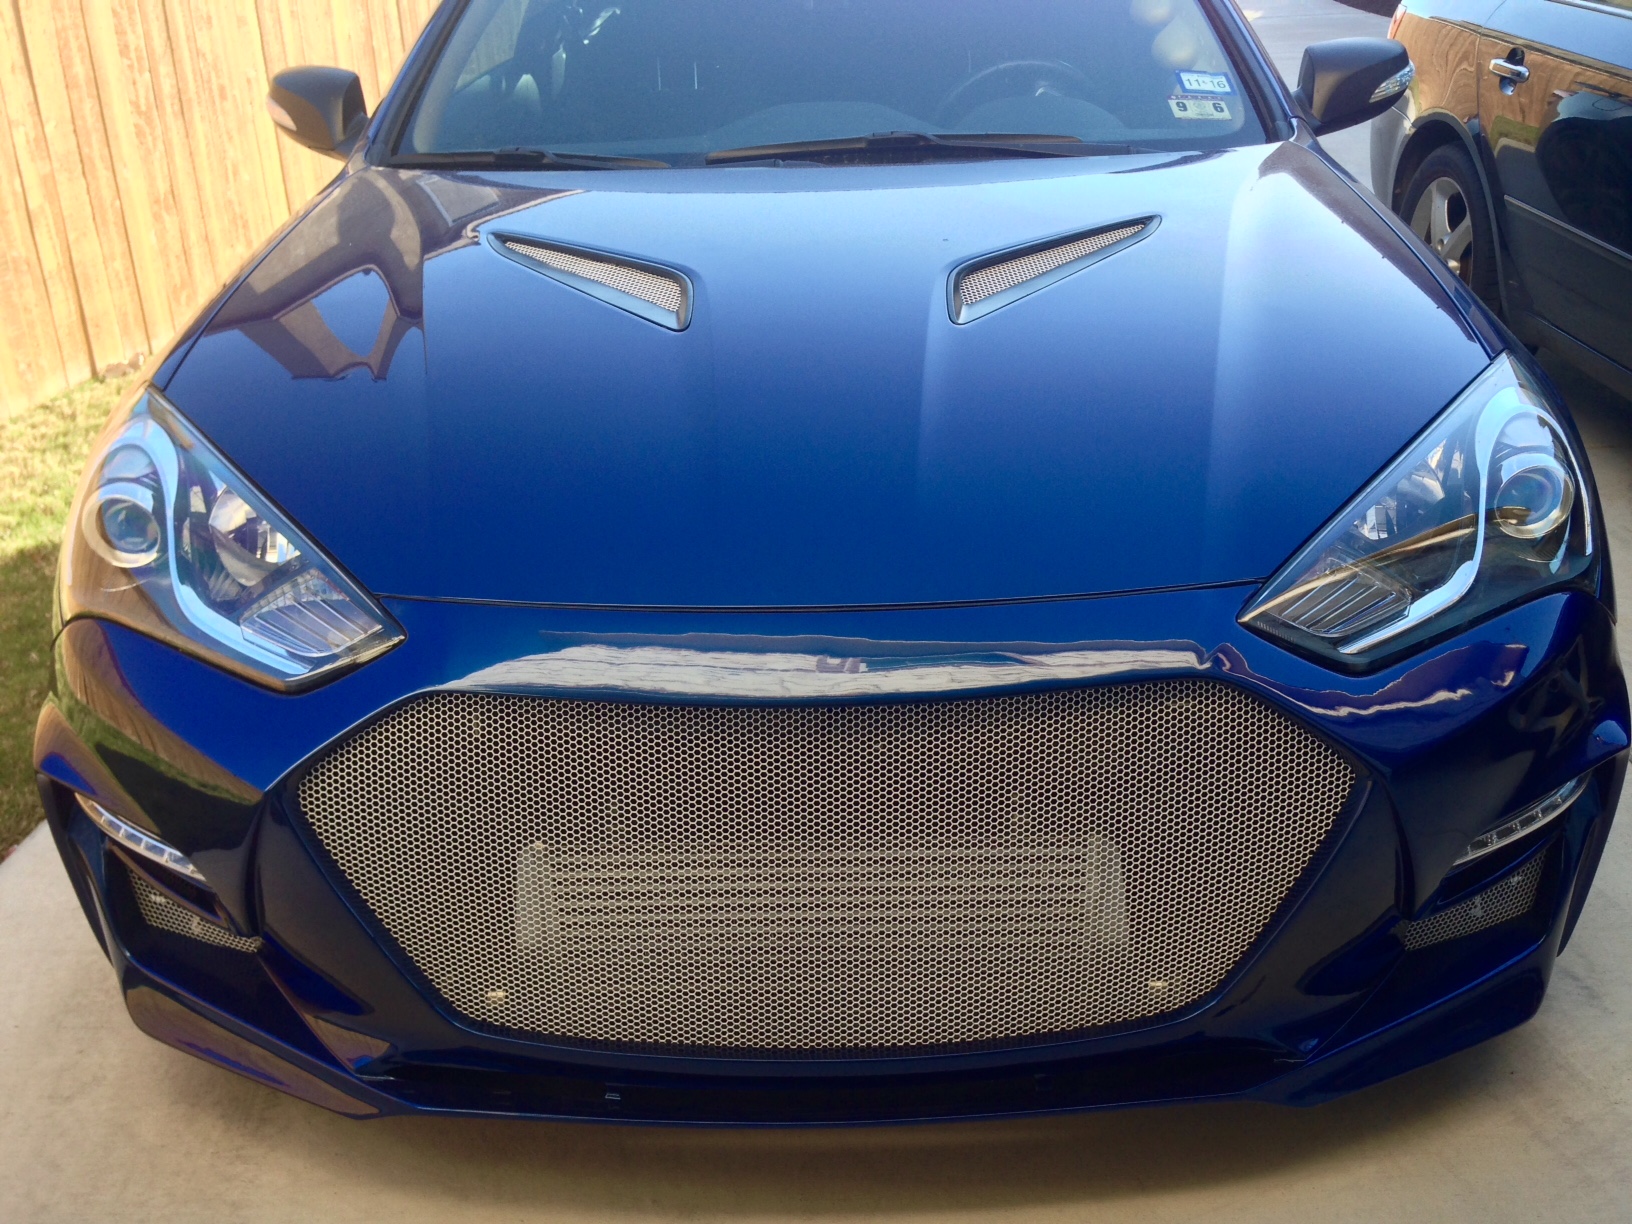
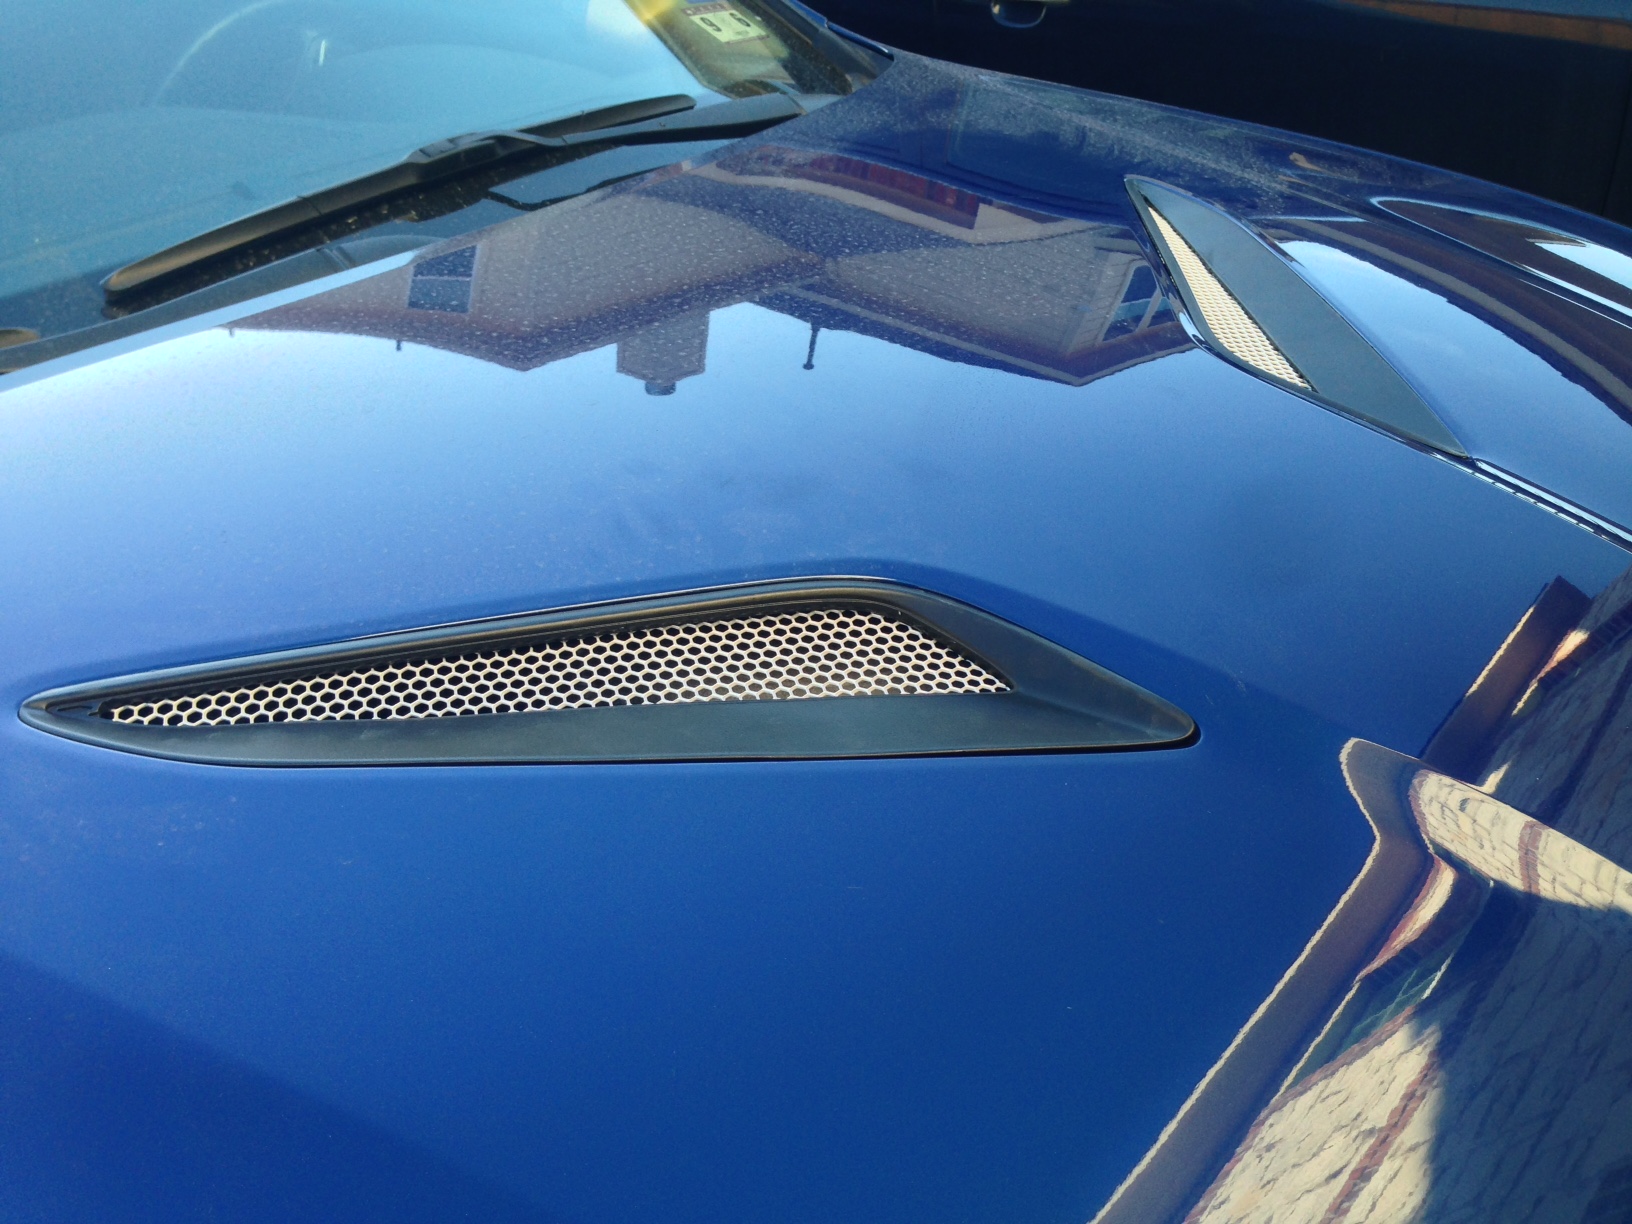
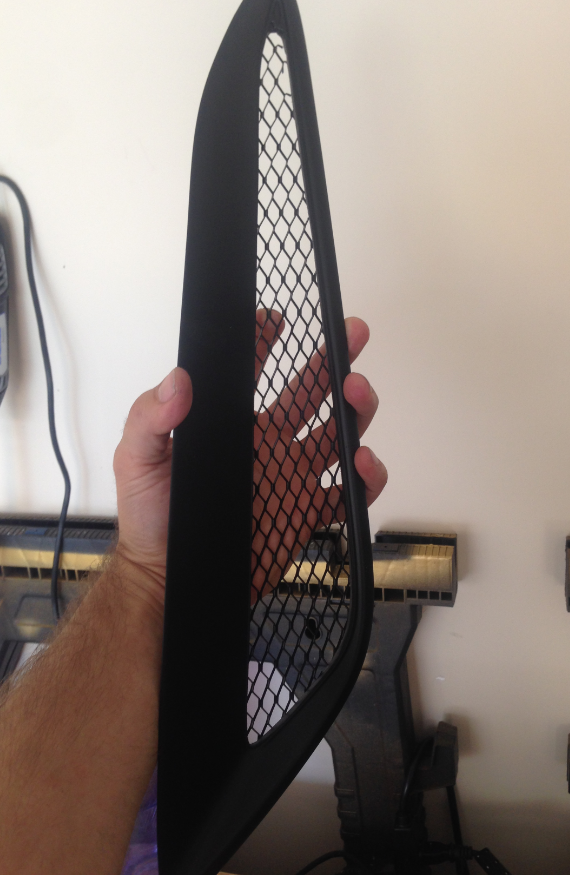
FIN!
![Image]()
![Image]()
Why do this?
Because it looks a lot better. I've always hated the fake vents. On all cars. I think I first saw them on a Mustang and was like "WTF?". There are a few reasons I wanted to do this:
1) It looks a lot better and I feel like less of a dweeb, having real vents.
2) Engine bay venting. My engine bay gets hot as hell and I want the heat to have an easier path out. (I'll get a vented CF hood eventually, but that's long term planning)
3) If you have the tools, this should cost you hardly anything at all to do. Just a lot of time. And possibly fingers, if you suck with razer blades as much as me.
Negatives
Pretty much just the fact that you can get water in your engine bay. With the engine cover on, most everything is protected. I'm gonna put a little electrical tape over the wiring harness on the Throttlebody, to just make sure it's good.
Removing the vents
• You'll need to take off your hood liner first.
It's a super pain in the ass to get those round plastic push pins out of the hood. The first time I took the liner off (to dip the hood), I was careful and used 2 small flathead screw drivers to safely get each pin out. This time, I just said screw it and ripped the liner off completely, destroying it. You're gonna have to either remove it or cut holes out of it, to vent it, anyway. I opted to toss it.
• Take off your hood vents. They're held in by x3 10mm nuts and a yellow push thing. I took the push pin off and threw it away. The nuts are plenty to hold it in.
Overview
So let's get one thing straight. I thought this would be as simple as using a dremel to cut out the shape, sand it down a little, dip / paint it, and glue in the mesh.
The problem with cutting with the dremel is that the cutter bit heats up the vent and starts to melt the plastic. So melted plastic beads up and gets everywhere. On top of that, I learned that my dremel only works in one direction, and if you're right handed like me, that direction is to fling melted bits of plastic on your arms.
So the second time around, I still used my dremel, but my strategy changed a little. And having a rugged box knife was extremely helpful.
Summary of events:
• Dremel cut the basic shape
• Box knife the edges close to what you want
• Dremel sand the edges down
• really sand the edges down
• Dip it
• Cut / dip the mesh
• Epoxy the mesh in
WINNING
Ok! Let the burnt arms begin!
Cuttin em up!
I started by putting a cloth around the bottom of the hood vent and then put it into a vice. As long as you don't crank it too hard, you won't have an issue. The vent is actually some pretty hard plastic. I had zero issue with it cracking or being too soft, during the entire experience.
To cut the vent, I used a Dremel cutter wheel #420 .
• You MUST cut from the back. I did it from the front on the first vent and it was MUCH more difficult. Trust me.
• These things heat up fast and when they heat up, they become real easy to break.
• Try to cut completely straight. If you bend the wheel at all, it breaks.
• It will heat up and cause the plastic to melt and start to get goopy. It's okay. It's fairly easy to clean up the goops later. But as you work, if you can gently brush the goops, they typically fling away.
• I found it easiest to cut straight through and then back it off and take a short break and then continue. Give the blade time to cool down.
• I think I broke 6 or 7 of these things through out the process, so make sure you have plenty.
• At anyone point where you are working on the opposite end of the vice, the vent might wobble slightly. Just hold the vent with one hand and dremel with the other. It's pretty hard to do any permanent damage to the vent at this point, even if you slip with the dremel.
You can follow the grooves that are already in the back of the vent. They are close, but you'll still need to trim more later. It's a nice buffer with a margin of error. If you're anything like me, you'll keep checking on the top side every minute or so anyway, just to make sure.


Part way done:
Done:
Sand some crap off!
I switched to the dremel cylinder sander and gently sanded down some of the melty goop crap. Just minor cleanup before the next stage.
Razering the edges closer
I'm sure there are a million ways to do this next step. I prefer using a heavy duty box razor. It just worked well for me.
• I have combat gloves that helped keep my hands safe (sometimes cutting towards my hands worked a little easier).
• I bought this perfect box razor from Home Depot. It worked really well.
• I just kept shaving off small layer after layer, until getting close to the edge I wanted.
• I was being pretty rough with the plastic and it didn't crack or even feel like I almost broke it. So unless you're he-manning it, you shouldn't have an issue.
• Have patience. This was probably the longest part, but it works really well for a clean look.
light Dremel sanding
Clean up the razor blade work just slightly with the sand cylinder on the Dremel. This makes it easier to fine tune the line. But be careful, too much and it'll melt more and cause the plastic to goop up. This is just minor clean up.
Proper Sanding
For this I used 80, 150, 400, 1000, and 2000 grit sand paper.
It's not rocket science. Start with the 80 and really work out the shape of the vent. Go to town until the shape is good. Then progressively work your way up until the whole this is smoother than a baby's ass. The progression:
Paint
You do what you want here, but I like the way dip looks. Maybe I just suck with paint, but I like it. I cleaned and dipped the vent.
I didn't get a pic of the dip job, so you'll just have to see the done product.
Installing Mesh
I scored some mesh from Home Depot that looks damn close to the OEM fake mesh on the stock vents. I like it!
• I dipped my mesh black to match the vents.
Installing the mesh isn't terribly difficult, but you'll have to be quick. Epoxy dries stupid fast.
First line up the mesh with the vent to make sure it's the direction you want. I followed the OEM alignment.
Just lay the mesh over the vent and then snip around the edges you need with tin snips. You don't have to be exact, just don't trim too much. You can always trim more after you glue.

I had to bend the edges down a little first:
I used this for epoxy:
Once you mix the two chemicals, you have like 90 seconds to complete the task.
• Just run the epoxy around the edge of the vent. I had some drip onto the other side, and it sucked. I had to peel the dip and respray. So try to keep it all on the rear side.
• Immediately put the mesh down where it needs to go
• Put something heavy on the mesh to hold it in place. I found that impact gun sockets work nicely
FIN!